Tuesday, 31 December 2013

Choosing the best photos

By shooting non-stop, as my nephew moves a lot, I have accumulated a LOT of photos. It takes a long time to narrow them down. 
Firstly, I look back at my contact sheets and write down which photos I like the look of and the ones that best fit my project brief.
I then go back through the contact sheets again, re-looking at the images I've jotted down, and pick my favourites from the favourites - usually these will be the best in terms of fitting my brief, and if I have any that I really personally like.
My next step is to then open each image on Photoshop, where I have a larger view of the photos, and then if I still like them, I'll edit them. 
After the edit, I'll decide if I think they're worthy of being used.
I will show my favourites in the next post.

Final shoots

Below are the contact sheets for my last three shoots. All shot on one day, I was following my nephew around with my camera like a hawk as I knew it would be the last day I'd see him. I've split them into three separate shoots - one with him eating, one of him watching tv/playing with an iPhone and the last of him outdoors in the park.


Equipment

As mentioned before, I'm using a Canon 40D to shoot with. This is an upgrade to what I usually shoot with (Canon 300D).
I have two lenses, the standard 18-55mm lens and a 50mm lens. The majority of the time I have been shooting with the standard 18-55mm lens, as it has the zoom option which works well with the nature of my close-up images. As the 50mm lens doesn't have a zoom option, it's harder to follow my active nephew around to get the right shots - and it also means I have to be REALLY in his face and intrusive. Although the 50mm lens does create amazing depth of fields, overall the standard 18-55mm lens won.
The speedlite used is also shown, it also had a remote to use so that the flash worked separately to the camera, but I decided to not use it. The screen on the speedlite is where the power is adjustable, and at the top of the speedlite (where the flash is which isn't visible in the photo), is the diffusion card. It slots out to diffuse the flash light, which ultimately makes the flash softer.

Monday, 30 December 2013

Explaining aperture

As I've been mentioning aperture, f-stops and shutter speeds in my past posts, I thought I'd dedicate one especially to it.

Above is a diagram of f-stops. Ultimately it shows that the higher the f-stop, the wider the aperture opens which therefore lets more light in. For example, if in low-light conditions, you'd use a higher f-stop so that more light is exposed to the camera. With this higher f-stop comes slower shutter speeds, as they work hand-in-hand. This means that when shooting in a low f-stop, the shutter speed will leave the aperture open for longer to let more light in. Generally this means that there is more likely to be blur in the photo, unless using a tripod or very still hand, as the shutter is open for longer.
The same goes for good light conditions. If in good light, a higher f-stop is needed to let less light in, which corresponds with a faster shutter speed. 

Aperture is also related directly to depth of field, which refers to how much of a photo is in focus. For example, a larger aperture means less will be in focus - ie, with a portrait of a person, their whole face may be in focus, but the background is out of focus. This also works the other way round, with a smaller aperture (so a higher f-stop number) the whole scene should be in focus, such as a landscape photo. So therefore, the smaller the f-stop, the smaller the depth of field, and the higher the f-stop, the larger the depth of field.

Experimenting with lights

As promised, I was going to experiment with artificial light, which isn't something I usually use in photography as I like my images to be as natural as possible. I took the chance to experiment with light whilst my nephew was eating, which I thought might be successful in trying to capture him with a messy mouth.
I used a speedlite which I attached to the top of my camera and adjusted to suit my needs. 
The photos below, which are all unedited, are of both the natural light used in the room and the speed light. I didn't have a light meter to hand, so I used my own eyes to determine the best light, power and aperture to use.


The room I shot in had one fairly large window which, as you can probably tell, was located to the left of my nephew. It doesn't let in too much light because it's situated behind a wall, the most light it sees is around sunset. However, I was shooting in the afternoon on a winter's day. The most obvious thing to me is that the images have quite a lot of noise. They aren't sharp, they're all slightly blurred, which is due to having to have a lower f-stop to let in more light, which delays the shutter speed and ultimately the movement from my nephew (and indeed me) creates blur. The natural light creates natural shadows and light on my nephew's face, which I like as it creates depth and tones that I don't think a flash could achieve. 


By attaching the speedlite to the top of my camera and adjusting the angle of the light towards walls to bounce the light off, I achieved these images. Similarly to the first set of photos without the flash, they are all blurry. I think this was because I hadn't yet adjusted my camera's aperture, I was simply trying to find the best way to attempt to create a natural-looking light. My first thoughts were that the flash was too strong as it was bouncing off the chair my nephew is sat on, which creates a harsh light in the photos. Also, I wasn't angling the flash correctly, as it wasn't capturing my nephew's face, but was getting the background objects. When I did adjust it slightly (as seen in the last photo), the light did bounce off my nephew's face, making it lighter, but was too harsh. I therefore adjusted the speed light's power, lowering until the light looked "right". Noticeably, the natural shadows shown in the first set of images had disappeared.
In these last three photos, I angled the speedlite from pointing to the ceiling to looking at the side wall (to the right). I also added a diffusion card to soften the light, as the previous photos came out too harsh, even with the power of the light turned down to its lowest. I also adjusted the aperture to work with the new light settings. Overall these images came out well once I'd got everything "right"! The first image is too light for me, too unnatural, I'm not sure why this one was different to the other two as I was using all the same settings - possibly the particular angle of either me or my nephew. The last two images came out well - they are generally focused, much more than without the flash, however his fringe is still blurred, but that probably has more to do with my own focusing (I was using auto focus, which can be temperamental when taking photos close up). The diffuser definitely helps to soften the flash, as shown by looking at the chair - in the second set of photos using a harsh flash, the light reflected off the chair which created a very unnatural effect. However, the diffuser (along with the different angle of the flash), help to eliminate this harshness. 
Although not perfect, the speed light does have its advantages. Once all the settings are right and the correct balance is found, natural looking photos can indeed be achieved in poor light. The most important parts are angling the flash correctly and making sure I'm using the right aperture. The aperture ultimately changes every time the flash changes in any way. If I hadn't constantly changed f-stop, then the images would have been either overexposed or dark and noisy. 

Although I do see the benefits of using speedlites, and indeed mono lights, soft boxes and light umbrellas (which I have experimented with before in my past projects), the nature of my project this year (and indeed last year) suggests that natural light is better. Obviously I am bias as I much prefer to shoot in natural light anyway, as nothing can compare to natural shadows, light and tones, however I do honestly believe that using natural light is the way forward for me with this project. Adjusting the lighting takes up precious time with my nephew, who constantly moves and wants to do this or that - why faff around with lights when I can take photos in well lit rooms? Or indeed, outside, where light is generally not a problem in the day time.


Editing

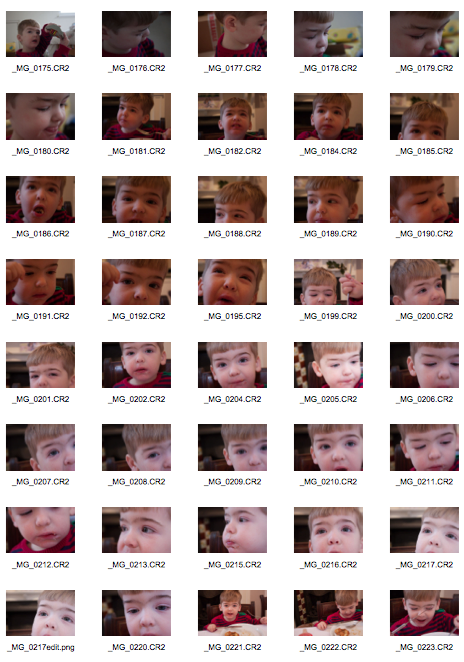
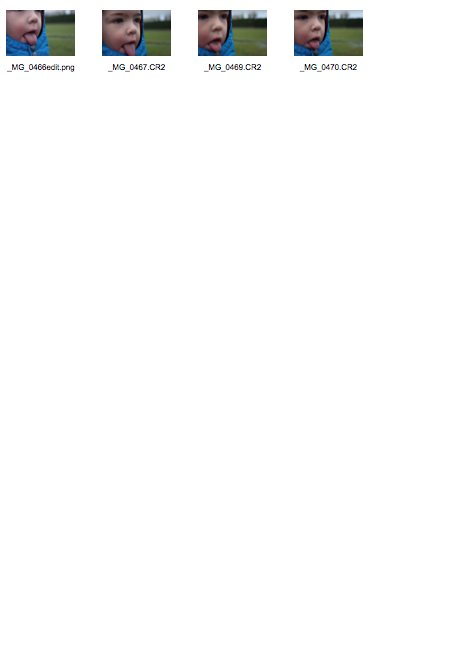
As I want this project to act as an extension to last year's project, my editing style will be similar, in keeping with the style of the project. 
Saying that, I generally use these techniques throughout most of my photos - whether casual photos or for projects. I like to keep things simple but effective, and I don't like too much colour.
Below is an in-depth explanation as to how I edit in Photoshop. I use these techniques for all my images, changing them to suit the style (ie, some may need more exposure than others, more contrast, etc).

I start with an image:
I then use the pictured features to adjust my image. As mentioned, I like to keep things simple, so there isn't a drastic change, but enough to see a difference.
My photo may look too light here, but I will change it slightly later to add more "depth" to the image. I realise that I need to keep my images slightly lighter on screen, as when they print they generally come out slightly darker, hence the change in exposure and whites.
This is the image I then base everything else around.
To add the "depth" I mentioned before, I use curves to adjust the lights/darks and contrast of the image. By upping the exposure, whites, lowering the contrast and blacks in the original RAW edit mode, my image looks slightly 'white washed'. To add back the depth, the dark colours that provide contrast, the curves function achieves this. As pictured, it doesn't take a lot of adjusting to add depth to the photo. I've added a point at a point of the grey histogram which effects the lighter colours/tones, and one lower down to adjust the darker tones. As said before, I know my images will print darker than as seen on screen, so the lower point isn't matching the grey histogram's point as it would be way too dark.
After adjusting the curves, I re-do the saturation and lightness slightly. I adjust the sliders until the photo looks "right" to me. The saturation of the photo is perfect in my eyes, as anymore and his skin turns pink and his eyes are superficially blue (although his eyes are very blue anyway!). Additionally, as I upped the exposure and whites so much originally, there's a little lee-way in terms of the saturation. I've very very slightly adjusted the lightness as I felt it was a little too white - however, when it comes to printing, I may re-adjust this again. Better to print a few different versions with different lightnesses to ensure I can pick the best looking photo after printed.
Now for the "real" editing. Although the point of this image is to show my nephew's blunt, slightly jagged fringe, there are some stray hairs that I feel deflect away from the fringe, and are generally distracting and messy. This close up shows the three single strands of hair that for me, really distract away from the image. Therefore, by using the clone stamp tool, I will very slowly and carefully erase the stray hairs.
By zooming in extra close (this is the far right single strand of hair), I use a small clone stamp brush, with a very low hardness (to avoid harsh looking editing), to carefully edit out the hair. This picture shows 90% of the work done - the mid-left section of the photo very slightly shows a more blurred area of skin, which is where the hair was. As this is so close, when zooming out it's unnoticeable and shouldn't be obvious when printed.
This image shows the strand of hair gone. Magic! I then repeat this step for each strand of hair, saving frequently just in case Photoshop freezes, or something awful happens.
The last things to edit out are some imperfections in the image. In this case, there is a small area of shiny-looking small spots just above his eye and under his eyebrow. I don't know what it is - probably something on my nephew's skin, but I don't like it in the image. The shininess makes it look as if I've done some really bad editing! Therefore, I shall edit it out in the same way I edited the strands of hair - with the clone stamp tool. There is also a small white dot on his lower eyelash - once again, no idea what it is, but I want to get rid of it.
This is the final edited image. The shiny area above his eye is gone, as is the weird white dot on his lower eyelash, and the three strands of hair. He seems to have a very small mole on his nose, in line with his eye, but I think to remove that would be taking my editing too far, as that is his natural face. Yes, his hair is his natural hair which I have edited out, but his hair will be cut and isn't permanently like that - whereas this mole will be on his face probably forever.

Below are the original and edited images:


Overall, the main changes (I think) are the lowering in saturation, which makes the image seem more stark, bare and natural; the editing out of certain imperfections, which help to keep the viewer concentrated on the main focus of his fringe and eyebrow(s); and the general lightening of the image, which not only brightens his face up which is easier on the eyes, but helps to brighten the main focus of the image too.
This photo isn't a drastic change - luckily I shot the photo in good, natural light and the photo just 'happened', which is rare, so there wasn't too much to edit. However, this is a good example of how I edit the majority of my images. Obviously it's harder with photos that aren't shot in good light as too much editing can lead to a lot of noise.


Friday, 20 December 2013

Favourite photos from shooting

I have very briefly adjusted most of these images slightly, mainly by lowering the saturation and vibrance, and adjusting the exposure/contrast.


These images are of Arlo having breakfast. He had a cold at the time and had only just woken up, with dried up snot from the night before under his nose and crusty sleep in his eyes (yum).
I wasn't in the right position to captured him using both hands holding the mug, so the viewer can only see one hand, however I think the design on the mug he's drinking out of hints to his age. Also, I think you can tell that he's drinking very slowly and carefully, as to not spill his drink, by the positioning of his hand and how close the mug is to his face.
My favourites from the shoot are the second image and last - I like how the second image shows him eating using his hands, he's shoving toast in his mouth, whilst clearly distracted by something, or in thought, as his eyes suggest. He isn't concentrating on what he's doing (eating), which again suggests his age.
The last image makes me laugh. I love the positioning of the photo - he was looking RIGHT at me (and the camera), so he's face-on. One eye is slightly droopier than the other, showing his tiredness, his mouth is slightly messy and his illness shows by his nose, but what I really like is that it looks as if he's blowing a kiss. I think he was actually talking to me and I just managed to capture his mouth at this position, but this image makes my project seem slightly ironic, as it looks as if he's posing. As i've said before, it was the simple fact that he didn't care about having his photograph taken that inspired me to do my project on my nephew, and I put his carelessness down to his child innocence. But this last photo shows him almost posing, which would suggest he did care and his photo being taken. However, he isn't posing. He's talking to me, probably about wanting to play with the "new train track upstairs" or that he likes peanut butter on toast, a lot. Either way, I really like the photo. I'm not sure if it's the most relevant image for my project, but I'll bare it in mind as I do really like it.

Below are photos from another recent shoot. I was in a bit of an awkward position as I had to navigate myself around a train track without breaking it. However, I shot in day light and this particular room I was in has two windows and is all white, making it an excellent place to take photos in natural light.


I really like all of the photos of Arlo playing with his train track. The first sets the scene and you can see he's "in the moment" as his hand is "in action" - he's naturally playing, you can tell I wasn't forcing him - he's in his own train world. However, that photo doesn't really fit in with my project in that I wanted close-up photos as to sort of hide his identity, therefore relating to child protection and his age. The other train photos achieve this. I prefer the last two that have minimal background space in the photo, as to keep the focus on Arlo. I like how I managed to capture him through his train tunnel. It would have been good if his hand was in view, playing with a train, but then I suppose the view of his face would be obscured - can't have everything! I think I therefore prefer the third train playing photo, I prefer his expression in this one to the fourth one. I like the small area of carpet, I like how close he is to his train set, he wants to be IN his train track, living in his own train world (have you guessed he's obsessed with trains yet?). The photo captures what I wanted to achieve - a close up of him, whilst playing, but also captures his innocence. Although the train track is out of focus, it's still obvious what it is, so I don't think the audience will have issues in figuring out what he's doing.
The last three images are of him "brushing" his teeth (or chewing on his toothbrush). His dad eventually had to help him out and took control of the brush, as seen in the last two images. I'm not sure how I feel about these images. I like the idea of him brushing his teeth (or his dad doing it for him) as a photo to be included in my project, however the images aren't quite as I would like them. I suppose i'd like an amalgamation of the third and fourth images - his mouth open with a clear view of someone else brushing his teeth for him, whilst he's looking away. If I get the chance to, I'll explore this activity again and hopefully get the images I want. If I don't, I think my favourite would be the last image.

Shooting

As mentioned before, I want my photos to be natural and am therefore photographing my nephew during his normal daily routine. I have tried to focus on the things he does slightly differently that reflect his age, such as using two hands to hold a mug, using his fingers to eat with, etc. Below are contact sheets of two recent shoots I've done with him.


Photograph ideas sketches

I'll be the first to admit that I'm not the best at drawing, however sometimes it's easy to record what I want to achieve on paper by drawing. Obviously my images will hopefully turn out better than my drawings, and I have to allow for slight differences, but these are just a few ideas I have for possible shots.


Monday, 9 December 2013

Reflection on last year's feedback

I was really pleased with my grades from last year's photography module, however I am quite the perfectionist and constantly try to improve on as much as I possibly can,

Therefore, I want to take last year's feedback from my teachers on board. 

The first aspect I could improve on is the technical quality (fluency of technique, design, balance, clarity) of my work. Last year my project included the influence of Julia Margaret Cameron's use of soft focus in her portraits, so the comment regarding this aspect was to be careful that I did not use too much softness as to not risk alienating the viewer. 
With my project this year, I'm not using the same soft focus technique so that shouldn't be an issue, as my images will (hopefully!) be in focus. 
I suppose then, that I will have to be careful in terms of framing my photos to ensure I get the exact images I intend on achieving. As I am shooting close-ups, this makes it even more important that my images convey exactly what I want to be shown - a jagged/messy fringe, a messy mouth, playing with toys, etc.
I'm currently thinking of ways in which I can display/hand in my photos. Last year my photos were all A4, however this year I want my photos to reflect the theme of child innocence. I will post separately about my ideas regarding this. Hopefully the design element of my photos will be enhanced through a more carefully thought out way of displaying my images.
The balance of my images will hopefully come naturally, in that the images will all relate to one another, but will look part of a 'set' of images. They will all focus on the same subject, Arlo, but will displaying different aspects of his 'innocence' and childlike nature.
Similarly, the clarity of my photos should also hopefully come naturally. Both the quality of the photos and the theory behind them should be clear through theoretical explanations via my blog and carefully planned out photo taking.

Another aspect that was suggested from last year was something that I am also doing this year. The comment states "some of the barriers that may exist when taking portraits of the unfamiliar people were not present and perhaps this is an area that could be explored further in future projects."

I do understand and accept this comment. I can appreciate completely how photographers that take photos of strangers are capable of producing intense, exciting photos that may not be able to be created through taking photos of familiar people. However, as mentioned at the beginning of my blog, my whole idea for my project came from last year's project. I enjoy taking photos of my own family or friends, as I feel comfortable and like to think they do too. Where I usually only take photos of my family and friends at 'events', I really enjoy taking photos of them for projects, as it shows a different side to them that usually wouldn't be captured. Besides, there are millions of strangers that I could photograph, but there are only a handful of my friends and family. For these reasons, I like to take photos of the familiar. I like to think that I enable the viewers of my photos to view a different side of my friends/family, who are obviously strangers to them, in a more personal way.
As David Bate says, 'The pleasure of recognition is at work, whether it is the re-finding of a loved one's picture... or the uncanny impact of a stranger's face. In identifying the sitter, the viewing spectator derives a pleasure from the act of recognising and identifying' (2009, p.81). Hence, where I may know the subjects of my photos, the majority of the viewers won't, and therefore will still find pleasure in identifying them as strangers. 

I've also given myself my own feedback. I admittedly don't like to experiment with lighting. I am a real lover of natural light in photos, especially as most of my photos are 'in the moment', natural, not forced. I like to capture real moments, as opposed to set up, posed moments that wouldn't have happened if I wasn't there. However, I am aware that a flash (which can be attached to my camera) is generally not too intrusive. I would not like to set up soft boxes or reflectors, etc, as that is too 'studio' for me. I don't want to force my nephew to sit in front of a white screen and them faced him with harsh flashes. Besides it not fitting in with my project theme, I wouldn't want to frighten or force my nephew into doing certain things.
I may be able to set a room up with a reflector and place certain lights in places to make it not so obvious when photographing my nephew. He wouldn't be completely unaware but at least I wouldn't be forcing him to do anything. My brother, who is also a photographer, has quite a lot of equipment I can borrow, so I will probably try these things out when I next see my nephew. 

Other than these comments, my feedback for last year's work was really good and had no other suggestions (not that I'm suggesting there could be no improvements, I'm sure there could have been many, but there weren't any other comments on improvements in my feedback). 
I've always believed that a good project stems from a good idea. My ideas have always come to me randomly. I hate to force an idea as I don't think they will flow as well as an idea that happens naturally, so to speak. Everyone obviously works differently, but this formula seems to have served me well in the past, and hopefully in the future too!

Friday, 6 December 2013

Experimenting with film cameras

During class, we took out a Mamiya RB67 and were shown how to load it with film and the basic features. We then took the camera, along with a tripod and light meter, outside to use as a group. 


We set up a (simple) scene, adjusted the focus, held the light meter towards the subjects and then adjusted the ISO and aperture (f stop). We then took a few photos in hope that at least one would come out okay.


We took our film to the darkroom, mixed each solution needed, left the photos to develop for the correct amount of time at the right temperature, etc. We did everything we thought was right. We hung the photos up to dry and eagerly waited for them to develop. But they didn't - well, we could make out shapes and some features, but the photos were almost completely black! We still don't know what we did wrong, but we assume it was in the developing process as the we could make out a photo, but it just hadn't developed. Maybe the temperature was wrong, maybe we didn't leave them in the solutions long enough.. we don't know, but at least we can (attempt to) learn from our mistakes! 

At this point, I already knew I wouldn't be using a film camera. I find them too laborious and expensive to develop. I appreciate anyone who does use film cameras, as I don't have as much patience at they do, and the images captured by film cameras generally tend to be seen as more 'special' because of the time and effort it takes to take the photo and then develop them. 
However, I like to be able to take lots of quick photos and look back at them straight away. If I've done something wrong, I will know straight away and can adjust my mistake. Also, it makes very little sense for me to use a film camera when photographing a young child. As I've mentioned before, it's very hard to keep my nephew still - he isn't keen on having his photo taken, let alone being told to sit still. Besides, I don't want to pester him for the sake of my project - I want all my photos to be captured naturally. So, for these main reasons, I shall stick to my Canon DSLR. However, it was fun to play with the older cameras!